Magento and Magento 2 have always provided a level of sophistication for product attributes. Before diving into the creation of products, you need to explore a very important and powerful feature of Magento 2: product attributes. Read on to become familiar with product attributes in Magento 2.
Product Attributes Overview

Magento 2 uses attributes to manage the information associated with products. An attribute is a property of a product. For example, the product color, the size, or the description. Some attributes are built into the system by default. And others can be created to address specific needs. You can add, edit, or remove product attributes in Magento 2 to customize your products.
The attribute set represents a list of attributes that are related to a specific product family. After creating the attributes, we organize and group them into different attribute sets. Each product has a unique DNA, thus you need different dedicated attribute sets specific to each product family. For example, shoes and cameras require different specific types of information. Shoes could have different colors, brands, and sizes. While a camera could have item weight, optical zoom, megapixels, screen size, iso range, etc.,
Why is Magento 2 product attributes so important and powerful?
Product attributes are the building blocks of your Magento 2 product catalog. They not only describe the characteristics of a product, but they are also used as search parameters, as criteria for layered navigation, product comparison, and price rules. Let’s go through a few practical use cases of product attributes and attribute sets that essentially help you manage a diverse array of product data.
Showing additional information on the product page
You can add a tabbed section with more information that catches your customers’ eye on the product page. The attributes listed above are for demo purposes. However, you can flexibly add any relevant product attributes into the More Information tab that help your customers get a better understanding of your products.
Using the Layered Navigation
Attributes can also be used to create the layered navigation that appears in the sidebar on your category pages. For example, when using Magento 2 theme Claue by ArrowTheme, the initial results include all products in the category. Section of layered navigation, the list can be filtered further by choosing a specific Color, Screen Size or price, etc.
Using Quick search and Advanced search

Magento 2 supports a quick search box in the upper-right corner. And a link to Advanced Search in the footer where shoppers can enter attributes as search criteria. With the Quick search box, the search text can be the full or partial product name or any other word or phrase that describes the product.
Advanced Search helps shoppers find products in your catalog based on multiple attributes entered into a form. You can specify an attribute to be displayed in the Advanced Search form by setting the frontend properties of the attribute to “Include in Advanced Search”. As a best practice, you should include only the fields that your shoppers are most likely to use to find a product. For example product name, SKU, description, and price, because having too many will slow down the search.
Adding attributes for product comparisons
Besides the roles as search criteria and filterable layered navigation, you can use attributes for comparison purposes. Magento 2 lets your shoppers quickly compare the features of two or more products side by side. You can certainly add or remove attributes that you don’t want to include in the comparison report.
Using price rules
Another powerful use case of product attributes is with price rules for promotion purposes. In Magento 2, product attributes are used as a set of specific conditions for catalog and shopping cart price rules. Price rules can be set in advance that trigger actions when the required conditions are met, such as:
- Sending your best customers a coupon for a discount on a specific product
- Offering free shipping for purchases over a certain amount
- Scheduling a promotion for a period of time.
When navigating to your Admin | Marketing | (Promotions) Catalog Price Rules, then clicking on Add New Rule button, you should see a Condition section similar to this screenshot:
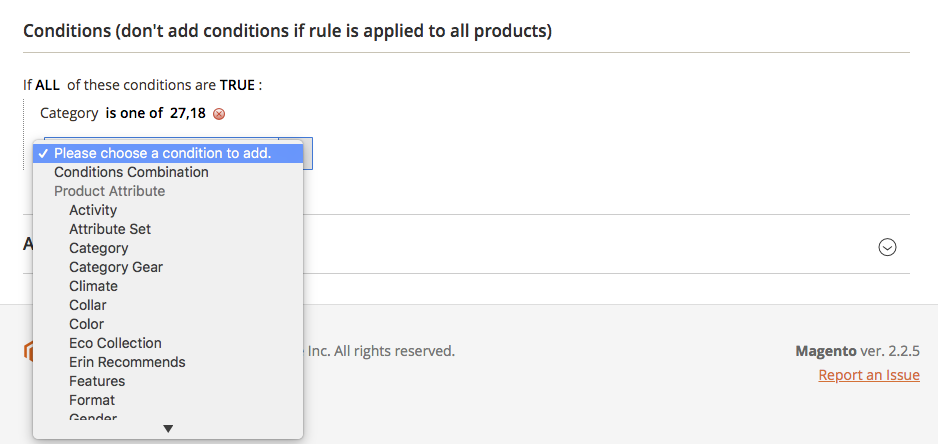
For an attribute to appear in the list above, you must set the Use for Promo Rule Conditions to “Yes” (This setting is available under the Storefront Properties tab of such attribute’s configuration panel).
Using for sorting in Product Listing
Product sorting is another area where attributes come in handy. If viewed from the Product Listing page, the sorting option will have default values: Position, Product Name, and Price. You can customize these sorting options your way. For the attribute, you want to use, set the Used in Product Listing to ‘Yes’.
Steps to Create Product Attributes in Magento 2:
Implement each step as shown below:
Fill in the basic properties
- Log in to Admin Panel
- Go to Stores > Attributes > Product
- Press “Add New Attribute“
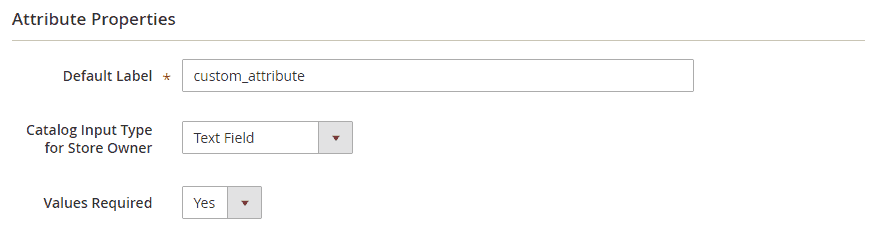
- In Attributes Properties,
- Fill a Default Label to recognize the attribute.
- Go to the “Catalog Input Type for Store Owner” field, and set the type in input control to be used for data entry.
- If you had selected drop-down or multiple select input types:
- Under “Manage Options“, click “Add Options“
- Enter the first value that you want to appear on the list. You can enter one value for the Admin, and a translation of the value for each store view. If you have only one store view, you can enter only the Admin value and it will be used for the storefront as well.
- Repeat the previous step for each option to be included in the list.
- For the option to be used as the default value, select “Is Default“
- If you had selected drop-down or multiple select input types:
- Set “Yes” to “Values Required” if you want to require the customer to choose an option before the product can be purchased.
Next, Enter the advanced properties
- Set a unique attribute code. It should be lowercase characters without any spaces.
- Select the scope from Store View, Website, or Global to indicate where in the store the attribute s allowed to be used.
- Enable the field “Unique Value” to avoid duplicate values.
- With the “Input Validation for Store Owner” field, you can validate the data entered in the text field.
- Set the “Add to Column Option” to “YES” to add this attribute to the list of column options
- Set the “Use in Filter Option” to “YES” to add the attribute to the list of filter options.

Then, Enter the Field Label
- Go to “Manage Labels” under Attribute Information
- Expand “Manage Titles“
- Enter a Title to be used as a label for the field. In the case of multi-language support, enter the title for each view.

And finally, Enter the Store Front properties
- Go to “Store Front Properties” under Attribute Information
- Enable the “Use in Search” field for the attribute to be available for search.
- Enable the “Comparable on Storefront” field to include it in product comparison.
- For the catalog input field to be dropped down, multiple select or price:
- Set “Use in Layered Navigation” to “YES” to use the attribute as a filter in layered navigation.
- Set “Use in Search Results Layered Navigation” to “Yes” to use the attribute in layered navigation on search results pages.
- Set the relative position of the attribute in the layered navigation block in “Position“.
- Enable the “Use for Promo Rule Conditions” field to use the attribute in price rules.
- Enable the “Allow HTML Tags on Storefront” field to allow the text to be formatted with HTML and use the WYSIWYG editor
- Enable the “Visible on Catalog Pages on Storefront” field to make the attribute visible in the catalog page listing.
- If Product Listing is supported with your theme, the attribute can be appeared and be used as a sort parameter by enabling “Used in Product Listing‘ and “Used for Sorting in Product Listing“

Save
Click the “Save Attribute” button to save the configuration.
You can see the custom_attribute created and listed in the Product Attributes grid:

Conclusion
Now that you have an overview of the essential roles of Magento 2 product attributes. The process is easy but you can always ask doubts, if any, in the Comments section below. Understanding each business has different requirements, Magesolution provides Magento Website Development service to help your online store become the best suite for business and also boost your workflow. With over 14 years of experience, our Magento experts have delivered hundreds of custom Magento development solutions to businesses of all sizes. Contact us for a free consultation!
Magento customer attribute: How to create it for Magento 2 stores


